Sunday, April 30, 2023

Celebrate It with the Party Gal!

 Hi on the last day of April and the last day for the current challenge on The Lost Coast Portal to Creativity:  Celebrate It!  So whatever occasion you want to celebrate, now is your chance to make something fancy or fun and post it over on the Portal for a chance to win some free stamps.


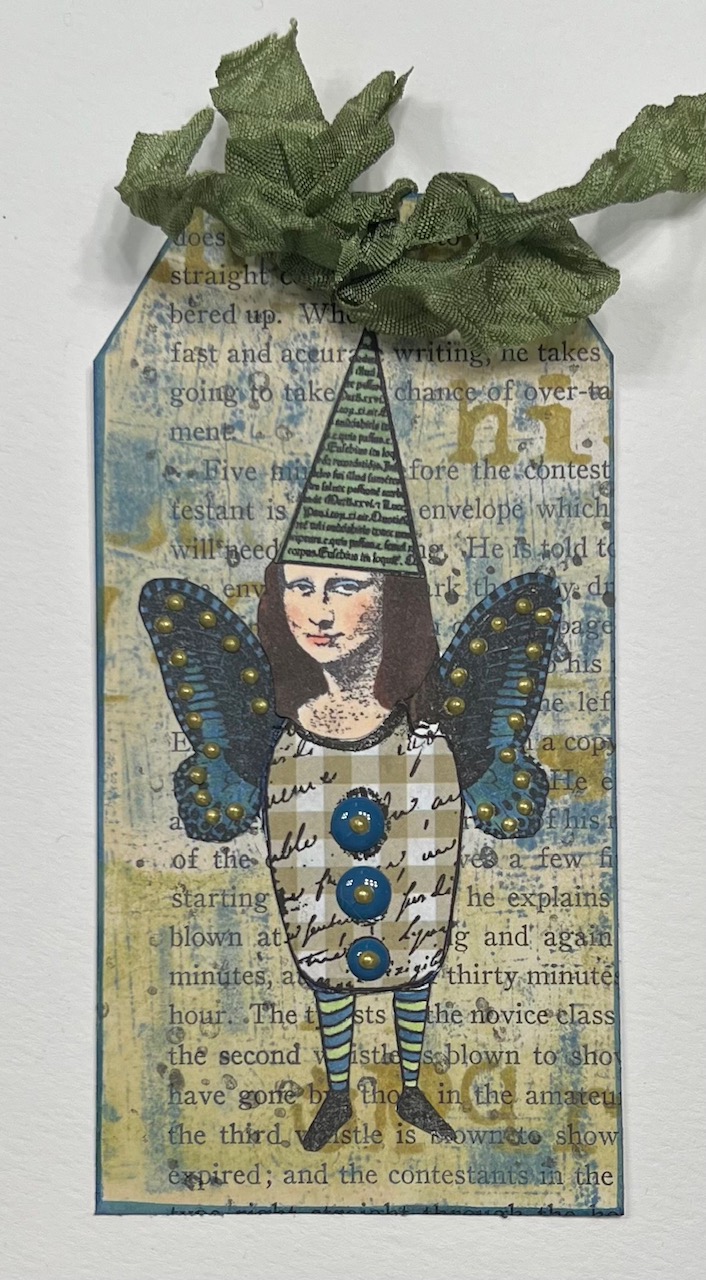
This card features the Party On stamp from Lost Coast Designs.   The little party lady was stamped with black ink onto white card stock and fussy cut out.  I colored her with Copic Sketch markers and tried to use some bright colors because she looks like the kind of little old lady who would love bright colors!

My background is made with two different stencils, and I used Distress Oxide spray inks in bright pink and orange for the color.    I first did the flower then the concentric circle stencil on top.  My party gal is affixed with some foam tape to give her a bit of dimension and lift her off the background a bit.

We can't wait to see what you are celebrating right now!!  Be sure to get your submissions in today!


Tuesday, April 18, 2023

Flying Mona Celebrates It!


I'm here today with a tag for the "Celebrate It" challenge, currently going on over at the Lost Coast Portal to Creativity.  For this tag, I used the Mona Flying stamp and the party hat stamp from the Party Baby Set, all from Lost Coast Designs.


I made my background by stamping a gelli plate with alternating colors of blue and green Distress Oxide ink pads.  I then pressed a page from a vintage book onto the plate and pulled a print.  I added some extra with an alphabet stencil in one of the green inks I used.  I cut this into a tag shape and edged it with blue ink then added some black splatters randomly.

Mona was stamped with black ink onto white paper and fussy cut out.  I restamped her "dress" onto a piece of checked scrap book paper, cut it out, and glued it atop the original stamped image.  I colored her with Copic Sketch markers and glued her to my tag front.  The party hat was stamped with black ink onto white paper, cut out, and colored with a green marker.  I glued that atop her head as shown.   I added some blue enamel dots to the buttons on her dress and decorated the buttons and the butterfly wings with gold Nuvo Crystal Drops.  Finally she was attached to my tag base and some green seam binding was tied through the top.

So many things to celebrate - what will you choose?  Don't forget to feature some rubber stamping on your projects and post them over on the Portal for a chance to win some free stamps!


Saturday, April 1, 2023

Pop Up Butterfly


Happy first day of April and the start of a brand new challenge over on the Lost Coast Portal to Creativity:  Rock or Pop.  For this one you will create either a rocker card or a pop up card using whatever theme and stamps you choose.  I had to go to You Tube to find out how to make a pop-up card and there are some great tutorials there if you need inspiration for either the pop up or the rocker card.

I used two of the stamps from the Butterfly Set from Lost Coast Designs and the Queen of Everything clear stamp from Carmen's Veranda.  

I started by cutting a piece of 8 1/2" by 11" lavender card stock in half lengthwise, giving me a piece that was 4 1/4" by 11".  Using a glue stick, I glued a piece of decorative rice paper to the entire strip and inked the edges with Faded Jeans Distress Oxide ink.  I folded that strip in half, then folded the front flap back on itself at the 1" mark and glued that 1" piece down. So my card is essentially 4 1/4" by 5 1/2", but to make constructing the popup inside, the actual opening of the card is a square that is 
4 1/4" by 4 1/4".

For the inside of my card I used a piece of coordinating patterned paper to create the "pop up" part of the card.  I stamped the sentiment with blue ink onto white paper and used a circle die cut to cut it out. I edged that with gold ink and attached it with foam tape to the right side of the popup on the inside of my card.  

For the left side I used one of the smaller butterfly stamps and stamped that with the same blue ink on another die cut circle of white card stock edged with gold.  I colored it in part with a lavender marker and attached it opposite my sentiment with foam tape.  

If you haven't tried a rocker or pop up card, you will have fun with either or both of these formats.   Don't forget to prominently feature rubber stamping on your projects for a chance to win some free stamps!