Thursday, April 30, 2020

Myth and Magic at the Lost Coast Portal


Card made for the May "Myth and Magic" challenge at The Lost Coast Portal to Creativity.
This card features the AUD Chicken stamp from Lost Coast Designs.

The background is a piece of vintage book paper that has been stenciled with several stencils and shades of brown and green Distress Inks.  The edge was then torn and aged with Distress Ink.
It was then mounted atop a piece of torn edged off white handmade paper.

The chicken was stamped with black ink onto a square.  Then two sides were torn and all four sides were inked.  This was layered with a piece of handmade off white paper and a decorative brad was attached to the lower right corner.  The final step was to attach this to the center of my background piece.


Saturday, April 4, 2020

April Challenge: Spring's Muse


Here is a project for April for the Gecko Galz Design Team.  This is two envelopes fitted together in such a way as to make a little folder that can
then be collaged on each side.

I used the following Gecko Galz products:

Dreams of Spring Paper Pack (my new favorite!)
Papillon Paper Pack

Darling Girls Collage sheet
Charming Words collage sheet
Papillon Dreams collage sheet
Jardin Collage sheet
Everything is Rosey collage sheet


Wednesday, April 1, 2020

Whimsical Bird Tags


Welcome to the month of April.  Time for a new challenge at the Lost Coast Portal to Creativity:  Spring Has Sprung.  So use a spring theme to make your projects and be sure to include some rubber-stamping somewhere on you project.

I made three tags for this challenge using the Doris Arndt Whimsical Birds stamps Ruthie, Amelia and Flora.  I cut some pieces of Gelli prints that I had on hand in bright colors which seemed appropriate for springtime to use as my backgrounds.  I then stamped each of the three birds onto a piece of Gelli printed paper, focusing on a single color for each.  I used StayzOn ink for these so it would not smear.

I cut out each of the birds, then restamped the eyes for each onto white paper, cut those out, and affixed them atop my original stamped images.  I did the same thing with the beaks and the legs on orange paper.  For the blue bird with the polka dots, I painted those in with green acrylic paint.  

I glued each bird image to one of my tags.  I then stamped the sentiments Sing, Muse and Happy
onto some white paper with black ink and copied it using a smaller setting on my printer to reduce the size of each word.  I cut those out, outlined them in black ink, and affixed them as shown.

Final step was to punch a hole in the top of each tag and tie some colorful ribbon onto each.

We would love to see your spring creations, so go to the Portal for a chance to win some free stamps!


Saturday, March 21, 2020

Going Viral Sale!

  
 Going Viral Sale at Lost Coast Designs!!
Stay home and shop with a whopping 25% discount!!!

Use the code QUARANTINEUS at checkout.
Applies to new orders.  Don't forget to use the code!!!


Sunday, March 1, 2020

ATCs and ATC coin Challenge

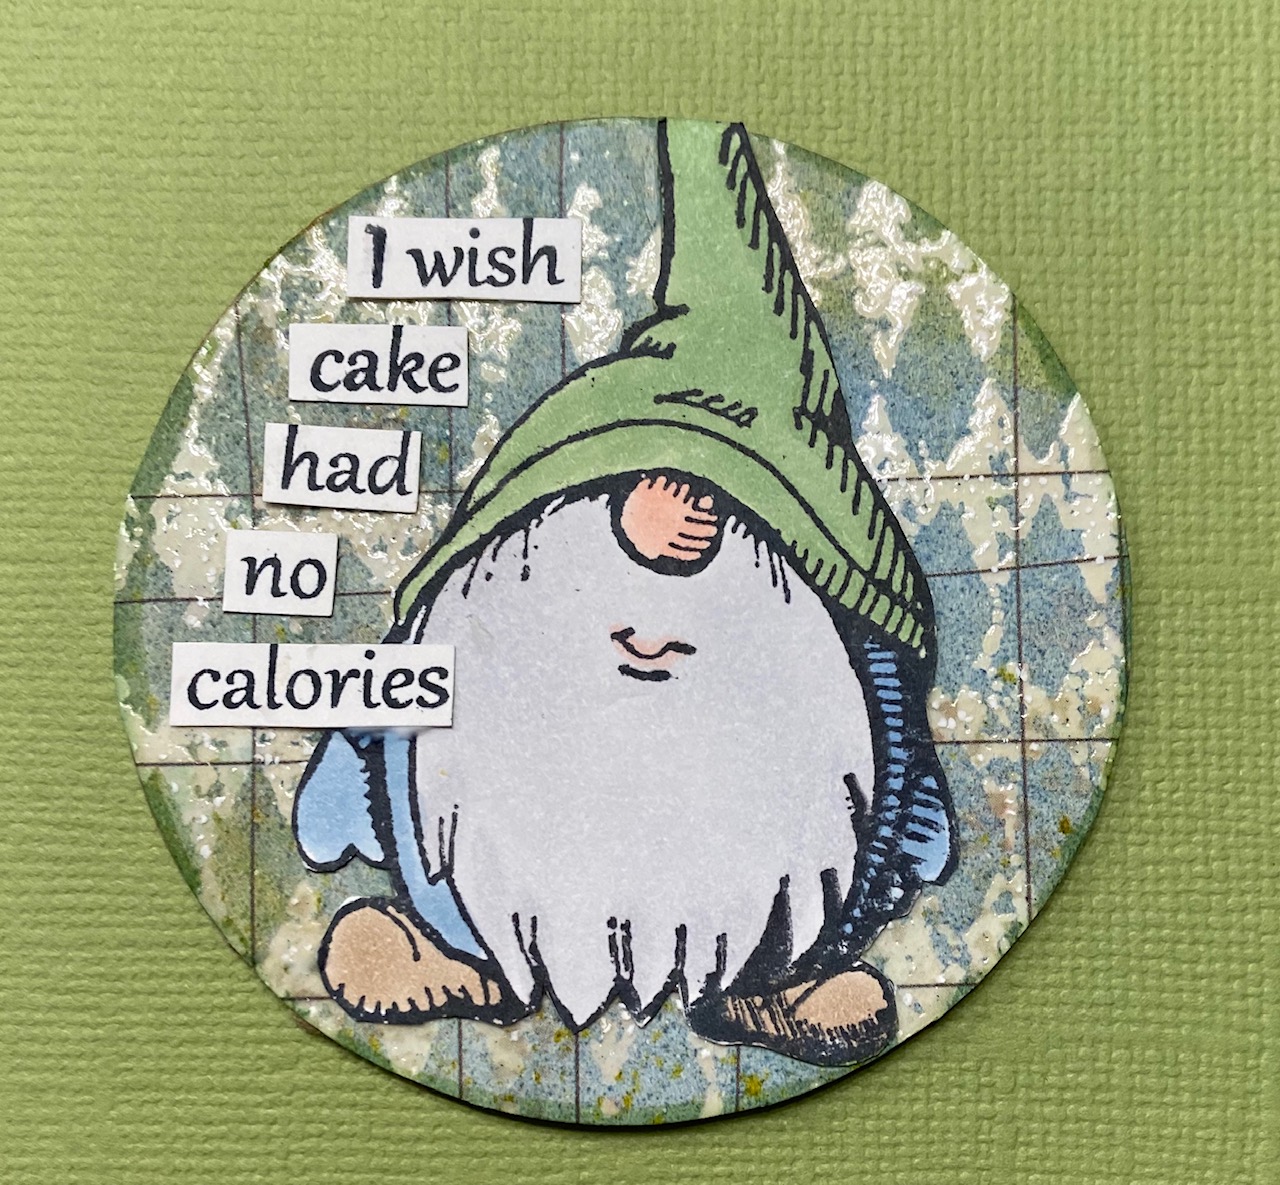
Hi!  I want to share an ATC coin with you that I made for the Lost Coast Portal to Creativity challenge:  ATC's and Coins.  This challenge runs from February 1st through the 14th.

I love the ATC coins.  I think they are a fun change up from the standard ATC.  I used one of the new Gnome stamps from Lost Coast Designs:  Pointy Hat Gnome.  Unfortunately since this is a coin, he lost the pointy part of his pointy hat!

I stamped my gnome with black ink onto white card stock and cut him out.  I used Copic Sketch markers to color him in.  For my background, I heat embossed the Little Diamonds background stamp with clear embossing powder onto white card stock.  I then took shades of blue and green Distress Spray Inks and spritzed my paper, then sponged away the excess ink.  I mounted my gnome as shown and edged my coin with green marker.  

The sentiment is part of a Carmen's Veranda clearstamp - Pets Live Longer.  The stamp has a longer saying so I just cut out the portion I wanted to use and glued this along the left side of my coin.

Here he is and if you want a chance to win some free stamps, join the new challenge at the Lost Coast Portal.


Saturday, February 22, 2020


Hi to all from Laurie with a fun card for the "Monkey See, Monkey Do" challenge going on until the end of February, at the Lost Coast Portal to Creativity.

For this card, I used the Pants On Fire clear stamp from Carmen's Veranda,
the Cheesecloth background stamp from Lost Coast Designs, and the Monkey Face stamp from Carmen's Veranda.

I started with my background, taking a piece of scrapbook paper with just a little bit of brown and green color to it.  I heat embossed the Cheesecloth background stamp with clear embossing powder onto my background paper.  I then used some Distress Spray stains in shades of rust, brown, and green and sprayed these randomly over my paper.  I blotted up the excess and dried my page.

Next I stamped my Monkey Face onto white card stock and colored it with Copic Sketch markers. I stamped my sentiment onto white card stock with black ink and edged it with Vintage Photo Distress Ink.  I positioned this at the bottom of my card then attached Mr.Monkey Face directly above this.  I layered my card front with a white panel, edged that with the same Distress Ink, and finished it off by added some Glossy Accents to the monkey's eyes.  

Let us see your "Monkey" creations before the end of February for a chance to win some of the awesome stamps from Lost Coast and Carmen's Veranda!


Sunday, February 9, 2020

Hi again with a tag for the current Lost Coast Designs Portal to Creativity challenge:  Tag You're It!  Simple challenge for the first half of February - just make a tag in any theme you like and be sure to include some rubber stamping on your work.

For this tag, I used the Butterfly Set stamps - the set includes 5 stamps but I chose to use the three smallest for this tag.

I stamped my butterflies onto a piece of clear acrylic using Stayz On black ink so the stamped images would not smear, then cut this into a tag shape.  For my background, I took a page from a vintage book and using Modge Podge, I adhered to it a decorative paper napkin with leaves and branches.  After that dried well, I glued my acrylic tag atop it and trimmed around the edges.  I thought it needed some kind of defining border, so I layered it with a tag shaped piece of black card stock. 

Final touch was to punch a hole in the top and thread a variety of ribbon and twine in colors of gray, cream and silver.  I love the way the butterflies on the acrylic let the background of the paper napkin show through.

So get your tags and stamps and art supplies out and see what kind of amazing tags you can whip up!